Part 2: Protecting WebApi deployed in Azure App service with Azure Active Directory
This is a second part in the series of how to protect an application with Azure AD. Application contains angular based front end and .net core based webapi.
In this part we will take sample .net core based webapi and deploy it to Azure App service. Subsequently, we will protect it using Azure App service’s Authentication / Authorization feature.
We are going to be following below steps in this article
- Create .netcore webapi project
- Deploy the project to azure app service
- Register an application in Azure AD
- Configure Azure App service with authentication
- Calling the protected Api using Postman
- Accessing protected swagger page
1. Create .netcore webapi project
For the purpose of this article, i have created a simple webapi project using visual studio. I have integrated swagger to get nice api documentation page. This project has been uploaded to following github location.
https://github.com/jogikalpesh/Quickstarts/tree/master/02-AzureAD-Api/SampleApi
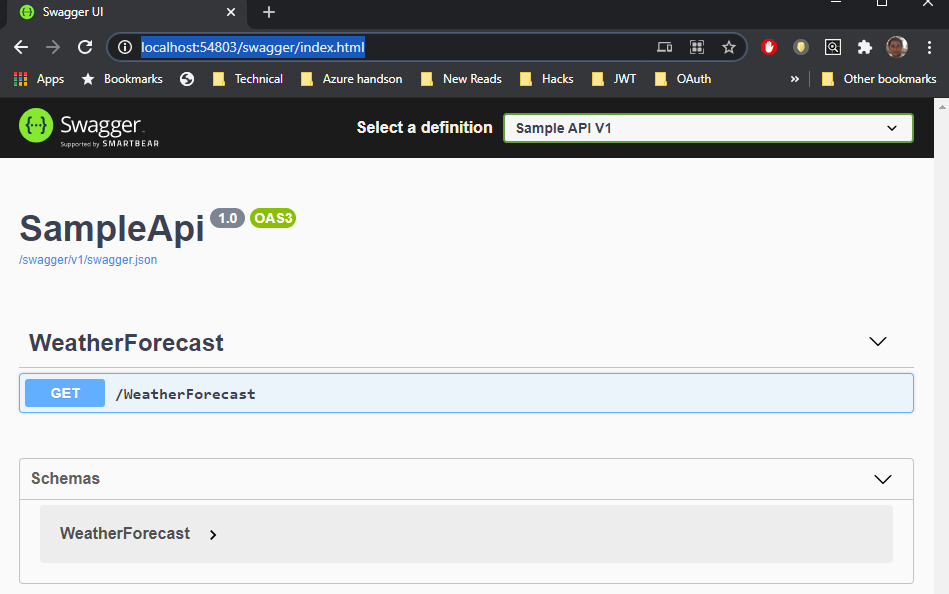
Let’s Run the project and navigate to swagger page by hitting following url. Replace port with appropriate value for your environment in following url.
http://localhost:54803/swagger/index.html
it should load following page
2. Deploy the project to azure app service
Azure App service running .net core 3.1 is required for completing this step.
There are multiple ways in which webapi project can be deployed to Azure App service. We have used visual studio’s publish feature to deploy this webapi. Simply right click on project and click on publish. Follow the wizard to deploy this project to Azure App service.
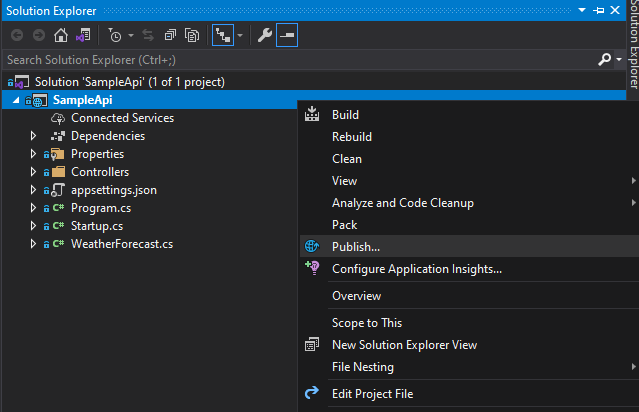
We can confirm the successful deployment by hitting following url. Just replace {Your_APP_Service_Name} with appropriate website’s name.
https://{Your_APP_Service_Name}.azurewebsites.net/swagger/index.html
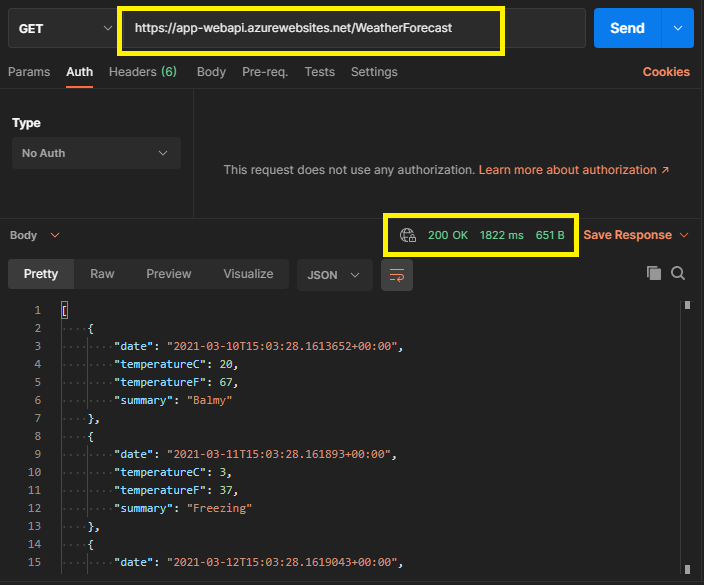
After deploying, we can use postman to call the api. Currently, the API does not require any authentication.
3. Register an application in Azure AD
Currently, the deployed api is not secured. We were able to call the api without any authentication. In order to protect this api, we will begin by registering application in Azure AD. This Application registration would represent our WebAPI in Azure AD.
Lets start by following below steps for registering our webapi in Azure AD
- Sign in to the Azure Portal
- Switch to a tenant where you want to register an application. This is done by switching directory.
- Search for and select Azure Active Directory
- On the left panel, under Manage, click on Application Registration.
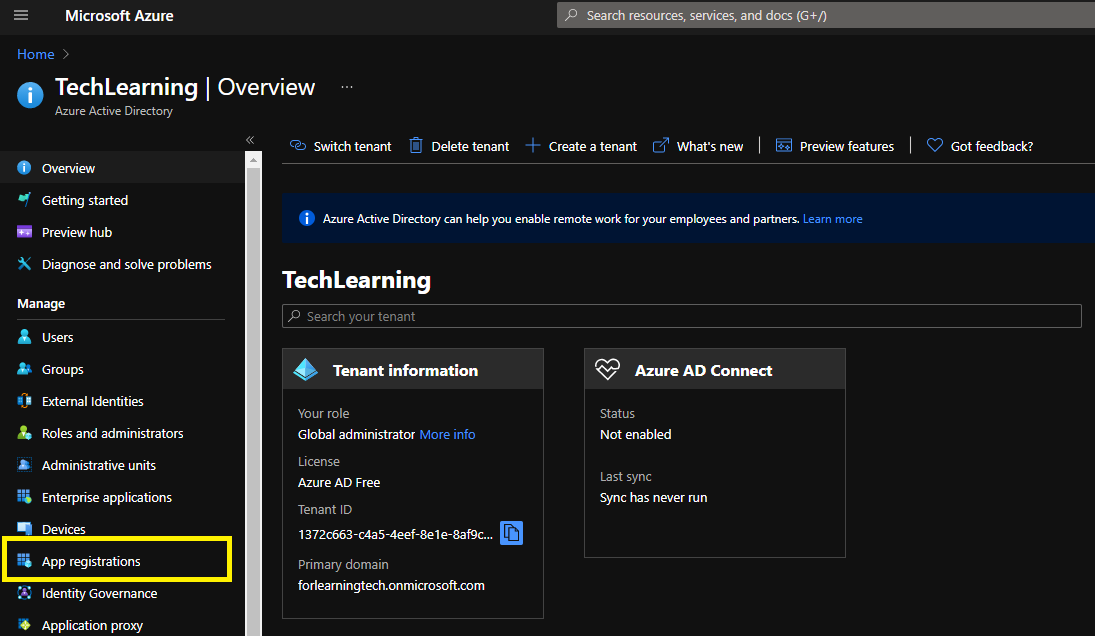
- Click on “New registration”.
- Provide Name.
- In Supported Account Types”, since we are developing this website as single tenant , we will Select “Accounts in this organizational Directory only”. With this configuration, only users only from your directory can call this website.
- (Optional) In Redirect URI section, select Web. Specify redirect Url in
<app-url>/.auth/login/aad/callbackformat. For example,http://app-webapi.azurewebsites.net/.auth/login/aad/callback. This step is not required if the webapi is not going to be accessed through browser.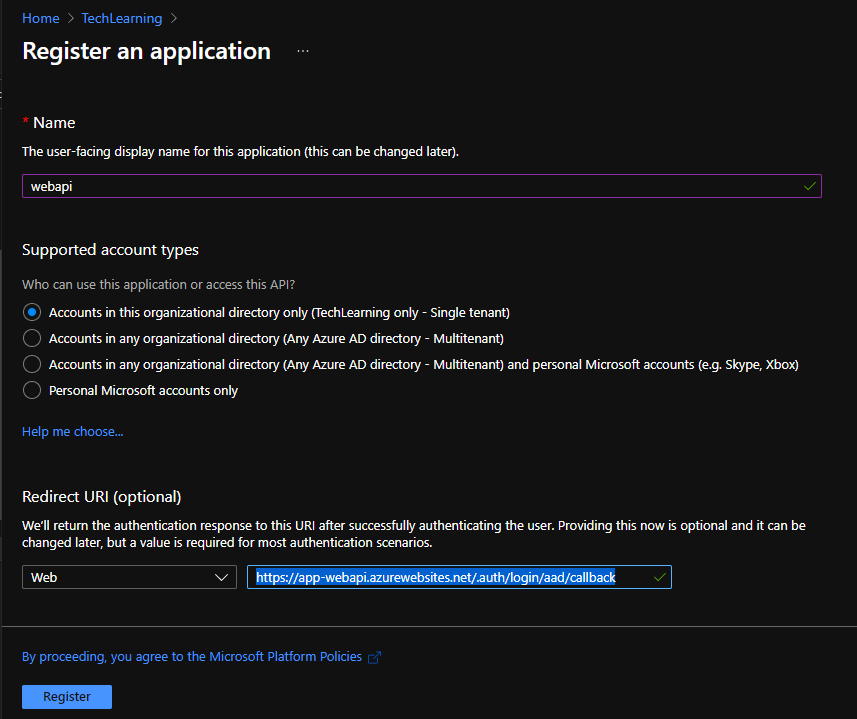
- From the overview section of the registered application, record Application (client) ID & Directory (tenant) ID. We will use these values in subsequent section.
- from the left panel, under Manage, click on Authentication. Under Implicit grant and hybrid flows, set ID Tokens(used for implicit and hybrid flows) to **True.
- From the left panel, under Manage, click on Expose an API.
- Set Application ID URI. You can use any valid url here. for example:
api://webapi.techlearning.com/ - Click on Save.
- Set Application ID URI. You can use any valid url here. for example:
4. Configure Azure App service authentication
- In Azure portal, navigate to your app service.
- From the left panel, under settings, click on Authentication/Authorization.
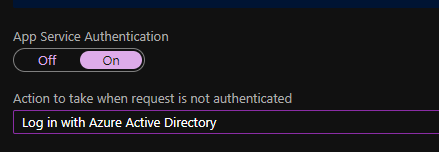
- Switch on App Service Authentication
- By default, unauthenticated access is allowed. For authentication with Azure AD, set Action to take when request is not authenticated option to Log in with Azure Active Directory
- Under Authentication providers, select Azure Active Directory.
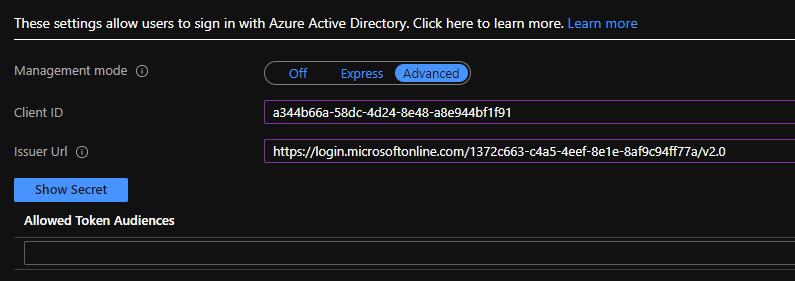
- In the Management mode, select Advanced.
- for Client ID, Enter Application (client) ID recorded from Application registration step.
- for Issuer Url, Use
https://login.microsoftonline.com/<tenant-id>/v2.0, substitute TenantId recorded from Application registration step. For example:https://login.microsoftonline.com/1372c663-c4a5-4eef-8e1e-8af9c94ff77a/v2.0
- Click on OK, and then Save.
5. Calling the protected Api using Postman
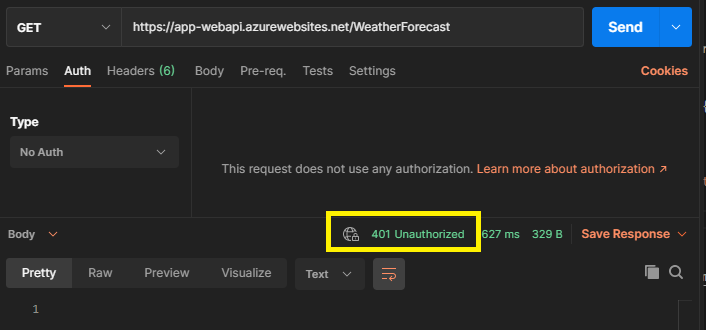
At this point, our api is protected. On calling the Api endpoint using postman, it should return 401 Unauthorized error.
We would need to send a Bearer Token to this Api. We would learn how to use logged in user’s credentials to acquire token for calling webapi in future posts. Meanwhile, we would use something called as Client Id & Client Secret to acquire token
Generating Client Secret
- In the Azure Portal, search & navigate to Azure Active directory.
- Open the Application Registration we created for webapi in the previous steps.
- From left panel, select Certificates & Secrets
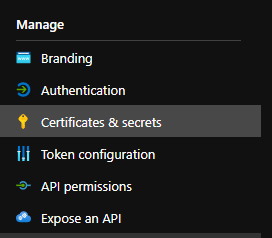
- Under Client Secrets, Click on New Client Secret. Enter description, select expiry and click on Add.
- Copy the “Value” (not Id). You would not be able to copy this value later, so make sure you copy and record it somewhere.

Generating Bearer Token
For generating bearer token, microsoft has provided the endpoint from where we can request the token.
- Open Postman, create a new request
- Select
Gethttp method, enter url ashttps://login.microsoftonline.com/<tenant-id>/oauth2/v2.0/token. Substitute right<tenant-id>recorded from application registration step. For example,https://login.microsoftonline.com/1372c663-c4a5-4eef-8e1e-8af9c94ff77a/oauth2/v2.0/token - click on Body, enter following keys and values and click on send. Record the Access Token from the response.
| Key | value |
|---|---|
| grant_type | client_credentials |
| client_id | Application (client) ID from application registration step |
| client_secret | client secret recorded from previous step |
| scope | Enter <application-id-url>/.default where Application-id-Url is url from application registration step. It is not App service url. For example, api://webapi.techlearning.com/.default |
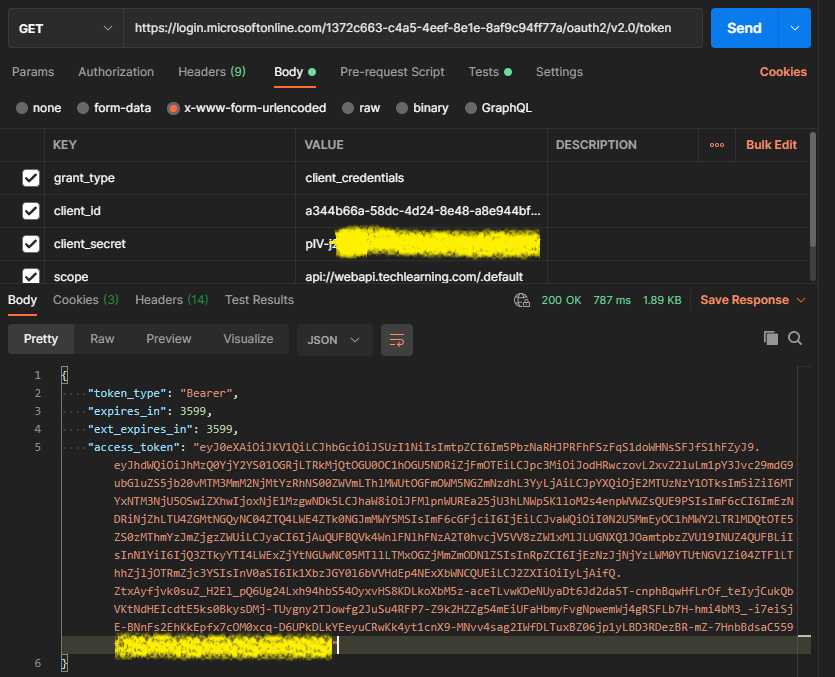
Call Api
After successfully generating the token, you should be able to call api. Use the Access Token generated in previous step and Add it in the authorization. Choose the type as Bearer and Put Access Token in Token field. See below for reference

6. Accessing swagger page
If you have followed the optional step of adding redirect url in Application registration section then you will be able to get to the swagger page from the browser. Navigate to your website, it will now redirect you to Azure AD authentication page. See below

On providing the right credentials, it will redirect to the App service again

References
Next Steps
Part 3: Calling Azure AD protected webapi from Azure AD protected Angular webapp

Comments