Part 3: Calling Azure AD protected webapi from Azure AD protected Angular webapp
This is a third part in the series of how to protect an application with Azure AD. Application contains angular based front end and .net core based webapi.
In the first part we have protected an angular webapp using Azure AD and in the second part we have protected .net core based webapi.
In this part, we will make a call to webapi from angular web application. We will embed necessary Authentication/Authorization details to the Api call.
At this point, we have two independent application components, one written in angular and another one in .net core. We have “application registration” in Azure AD to represent each of these compoents.
We will go through following steps in this article
- Calling a webapi from Angular web application without token.
- Adding a scope.
- Adding API permission.
- Calling a webapi from Angular web application with token.
1. Calling a webapi from Angular web application.
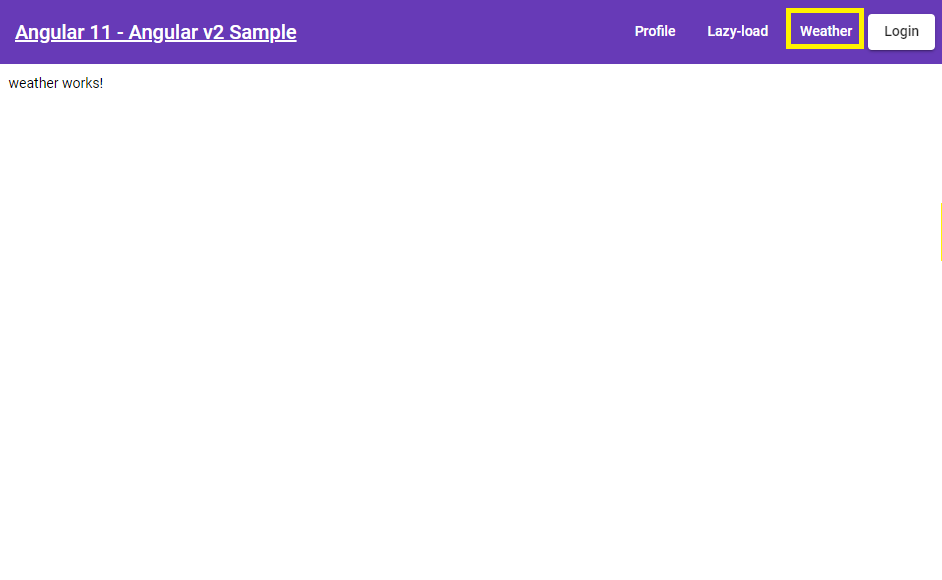
We have created angular application first part. I have added a simple page to show the temperature values. This page is simply making a call to the webapi we have create in second part and it is showing the result on this page.
Both these applications are available in following github repository
https://github.com/jogikalpesh/Quickstarts.git
Angular website:
https://github.com/jogikalpesh/Quickstarts/tree/master/01-AzureAD-SPA/angular11-sample-app
.netcore webapi:
https://github.com/jogikalpesh/Quickstarts/tree/master/02-AzureAD-Api/SampleApi
You can navigate to this new page by clicking “weather” menu in header. Since we are not supplying any authentication/authorization detail along with this call, the call should fail and you should get following error in “network” tab of “developer tool” in browser.
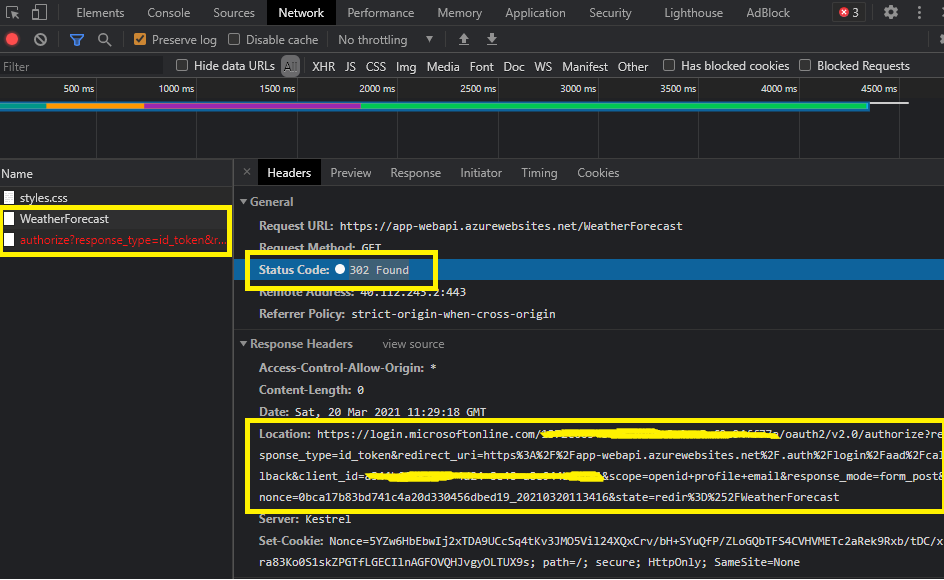
If you observe carefully then call to “WeatherForecast” api is returning “302 Found” status code. It is also returning “location” response header. This is happening because the call is not authorized and location header contains a link where user credentials can be provided. Since it is an “Ajax” call made to webapi, it would have been ideal if we had got “401 Unauthorized” instead.
2. Adding a scope.
After you have logged into Angular application. ID token is issued to it. We can actually use this token, to acquire another token which is meant for webapi.
In order to acquire token for the webapi, we have to first define a “scope” in webapi and give access to that scope to our web application. In the OAuth 2.0 parlance, webapi is a resource which is getting accessed on behalf of a user by web application. A Scope generally represents specific set of functionalities within the application. By defining different scopes, you can control access to specific functionalities within the application. Following are some of the microsoft hosted resources.
- Microsoft Graph:
https://graph.microsoft.com - Azure Key Vault:
https://vault.azure.net
Microsoft Graph, for example, has defined following set of scopes
- Read a user’s calendar
- Write to a user’s calendar
- Send mail as a user
Similarly, we will also require to define a scope for our web api application. We have to define a scope in “Application registration” created for webapi in second part.
To add a scope,
- Sign in to the Azure Portal
- Switch to a tenant where you want to register an application. This is done by switching directory.
- Search for and select Azure Active Directory
- On the left panel, under Manage, click on Application Registration.
- Open Application Registration created for webapi.
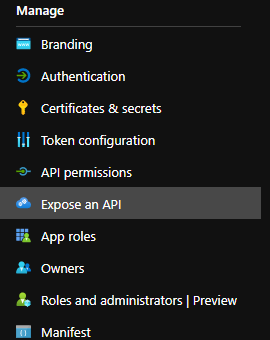
- On the left panel, under Manage, click on Expose an API.
- click on ”+ Add a scope”
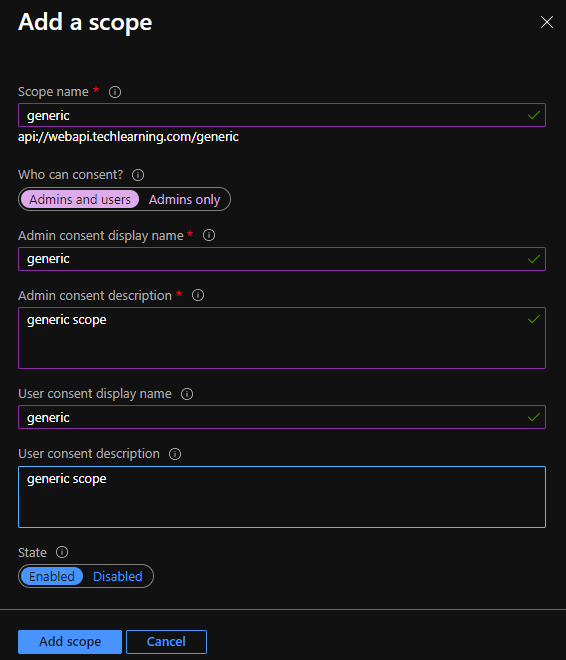
- provide scope name, who can consent? as “Admins and Users”, Admin consent display name, Admin consent description, User consent display name, User consent description.
- Click on save.
- It should show as below
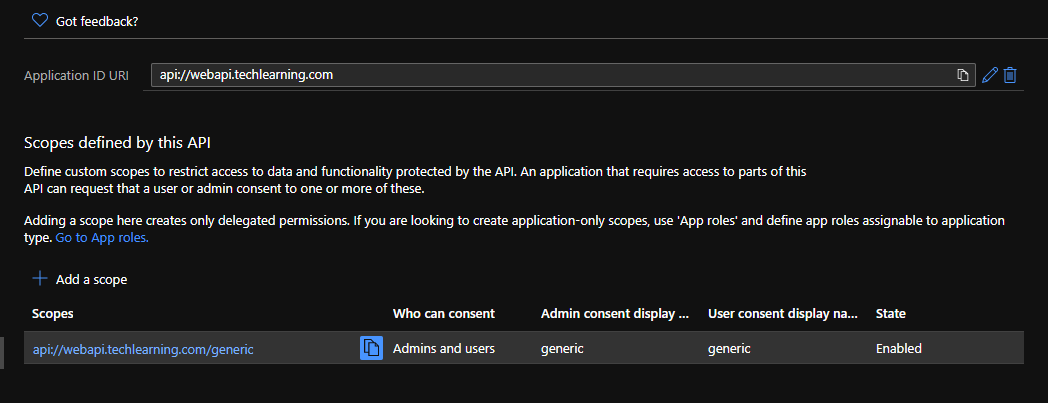
3. Adding API permission.
Now that webapi has exposed a scope, we have to add permission in web application for this scope. We have to do this in “Application Registration” created for web application in first part.
To add a permission,
- Sign in to the Azure Portal
- Switch to a tenant where you want to register an application. This is done by switching directory.
- Search for and select Azure Active Directory
- On the left panel, under Manage, click on Application Registration.
- Open Application Registration created for web application.
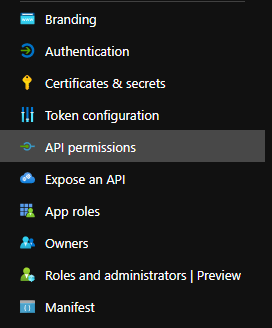
- Click on “Add a permission”
- Click on “APIs my organization uses” tab. It should display Application registration for “webapi”
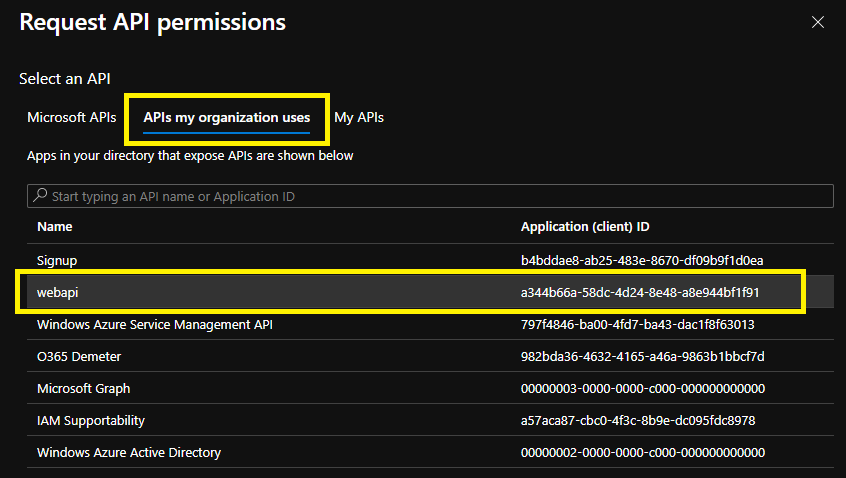
- Click on webapi related registration and it should display scope we have defined in previous section. Select that scope and click on “Add Permission”
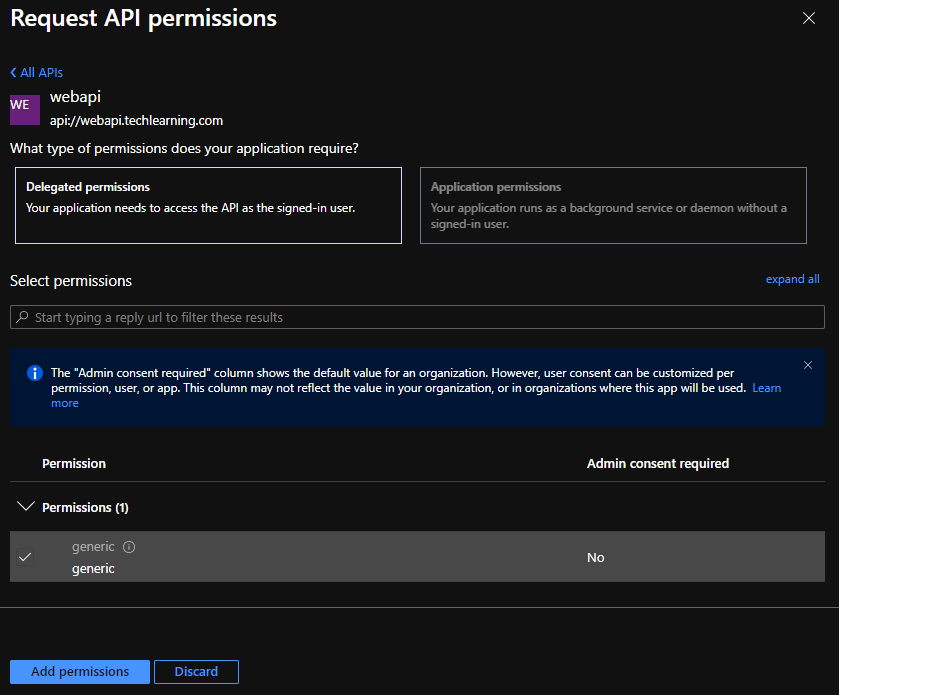
- After permission is added. It should show as below

4. Calling a webapi from Angular web application with token.
As previously mentioned, After you have logged into Angular application. ID token is issued to it. We can actually use this token, to acquire another token which is meant for webapi. We are using MSAL(Microsoft Authentication Library) in our angular web application. By appropriately configuring MSAL, token for webapi can be acquired and it can also automatically embed it to all the outogoing calls to webapi.
To achieve this,
- open folder corresponding to angular webapplication which was created in first part
- open
src->app->app.module.tsfile - Search for
MSALInterceptorConfigFactorymethod. - Add
Protected Resoruce Mapfor webapi. It is specified in following format. Specify webapi url for<url>andscopewe have created in previous section.
protectedResourceMap.set('<url>',[scope1,scope2,scope-n]);
Add it like below
  export function MSALInterceptorConfigFactory(): MsalInterceptorConfiguration {
  const protectedResourceMap = new Map<string, Array<string>>();
  protectedResourceMap.set('https://graph.microsoft.com/v1.0/me', ['user.read']);
  protectedResourceMap.set('https://app-webapi.azurewebsites.net',['api://webapi.techlearning.com/generic']);

  return {
    interactionType: InteractionType.Redirect,
    protectedResourceMap
  };
}
Once this is done, MSAL will acquire appropriate token and it will embed it to all the webapi calls. Now start angular web application and login. Upon login, you would now see consent page where it would ask for “permission” for the “scope” we have created for webapi. See below:
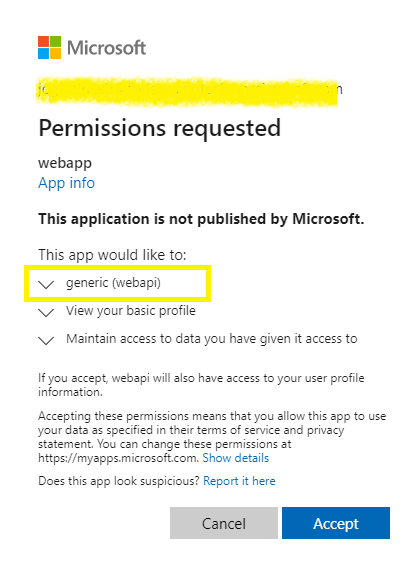
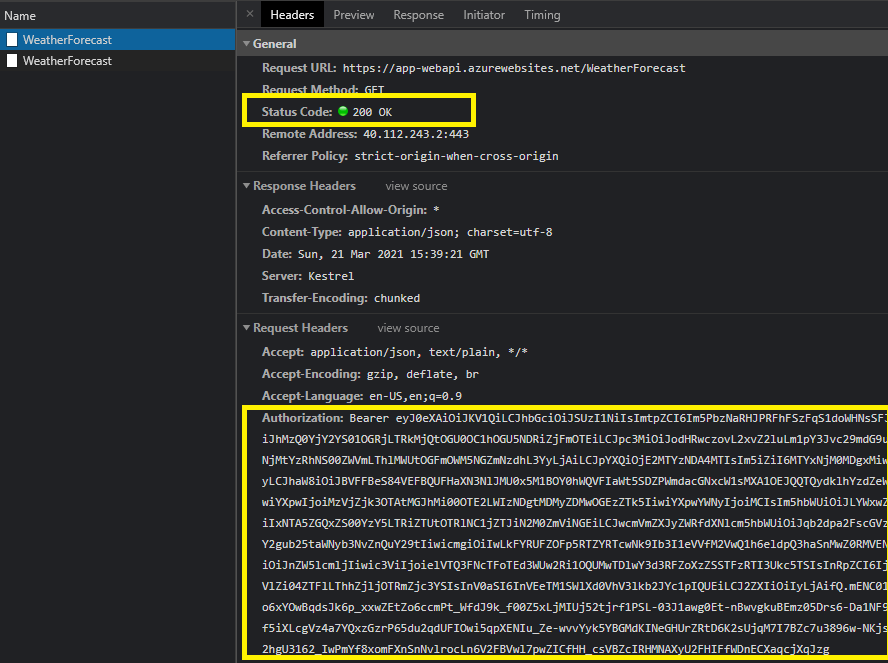
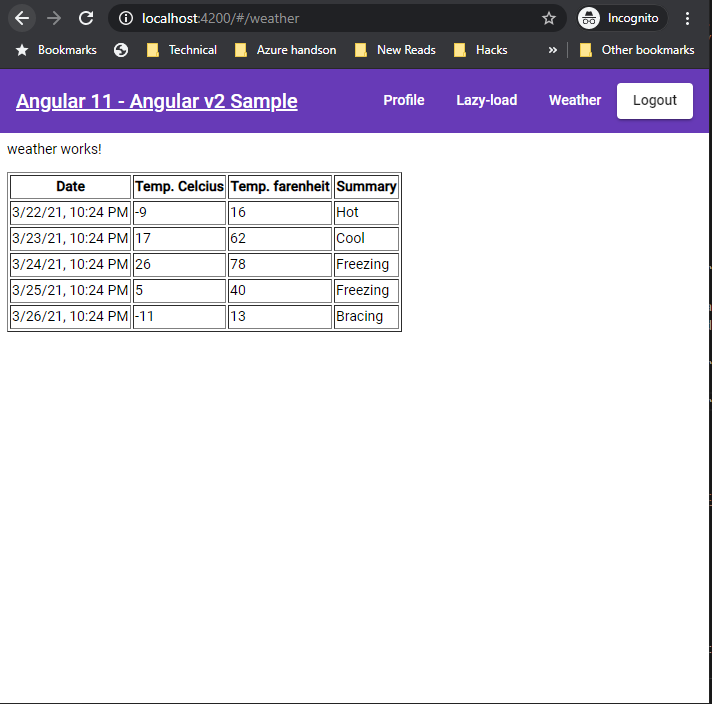
Keep browser’s “developer tools” open. from the website, navigate to “weather” page. Observe In the network tab that call to webapi is returning 200 ok response. MSAL is also embedding appropriate token to the call. Weather page should display a table with all the temperature values. See below:

Comments