Part 4: Converting single-tenant application secured with Azure AD to allow sign ins from Multiple Azure AD tenants.
This is a forth part in the series of how to protect an application with Azure AD. Application contains angular based front end and .net core based webapi.
In the previous parts, Angular web and .net based webapi were protected using Azure AD. Angular web was also configured to call webapi protected with Azure AD.
This setup works fine where application is expected to allow users from a specific Azure AD tenant. For example, it is an application where only users from your organization is expected to log-in.
However, if you are building a multi-tenant application where users from different Azure AD tenants can subscribe to your application and subsequently sign-in then this setup requires to be updated.
In this part, we will see how to update the application we have built in previous posts and we will enable it to allow sign-ins from different Azure AD tenants.
At this point, we have an angular application and webapi both are protected using Azure AD. Angular application is capable of calling protected api.
In this article, We will go through following steps to make this setup capable of signing-in users from multiple Azure AD tenants.
- Updating Azure AD Application Registrations.
- Configuring Angular application.
- Authorizing Client Application.
- Configuring Azure App service of webapi.
- Restricting Access to specific tenants.
1. Updating Azure AD Application Registrations
We have created Application Registrations Angular web and webapi in part 1 and part 2 respectively. These application registrations are currently single-tenat. It would required to be updated to be Multi-Tenant.
Lets begin by updating application registration for webapp.
- Sign in to the Azure Portal
- Switch to a tenant where you have registered your application for Angular web in azure AD.
- Search for and select Azure Active Directory.
- On the left panel, under Manage, click on Application Registration and open App registration you have created for Angular web.
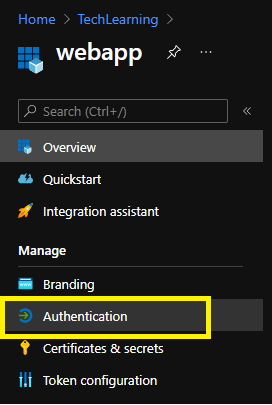
- Once inside App registration, from the left menu, click on Authentication.
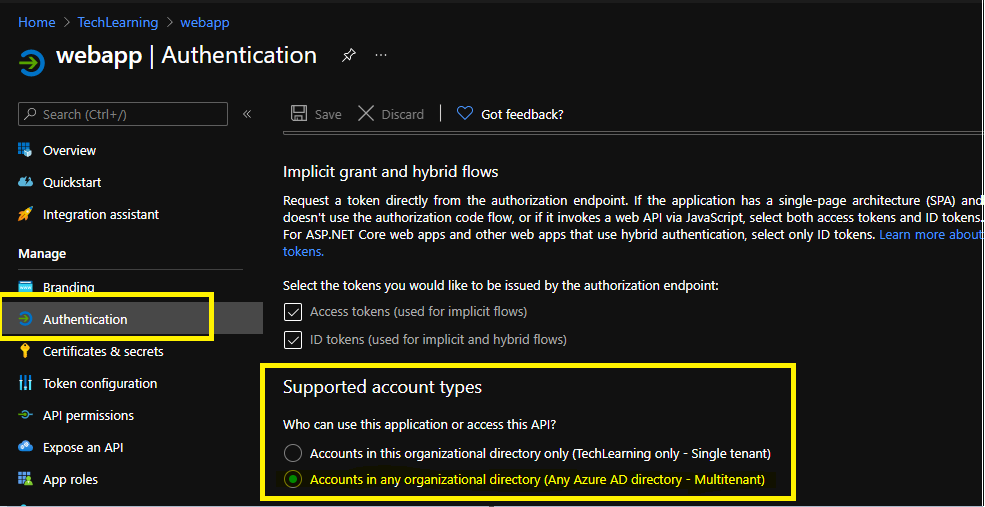
- Once in Authentication setting page, scroll down to Supported account types section. Select Accounts in any organizational directory (Any Azure AD directory - Multitenant) setting as below.
Repeat the above steps to Update the application registration for webapi.
2. Configuring Angular application
- Open the Angular web application created in part 1.
- Open app.module.ts located in app folder.
- Search for MSALInstanceFactory method in this file, and update Authority endpoint value. For single-tenant scenario, the url was in
https://login.microsoftonline.com/<tenant-id>format where<tenant-id>is the specific tenant id of the Azure AD. For multi-tenant scenario,<tenant-id>should be substituted withcommon. Authority value should be replaced withhttps://login.microsoftonline.com/common. See below
  export function MSALInstanceFactory(): IPublicClientApplication {
  return new PublicClientApplication({
    auth: {
      clientId: '35cf9790-0ba2-4916-b348-032d308a3e99', // <--- Update ClientId here
      redirectUri: '/',
      postLogoutRedirectUri: '/',
      authority: "https://login.microsoftonline.com/common"
    },
    cache: {
      cacheLocation: BrowserCacheLocation.LocalStorage,
      storeAuthStateInCookie: isIE, // set to true for IE 11. Remove this line to use Angular Universal
    },
    system: {
      loggerOptions: {
        loggerCallback,
        logLevel: LogLevel.Info,
        piiLoggingEnabled: false
      }
    }
  });
}
3. Authorizing client Application
Before this step, Lets run the application. Once application is loaded, click on login. Make sure you now login to the application using Account other than the one from your home tenant. Once logged in, navigate to weather page.
Page will run into error and you may not see the data. Open developer tools, and look for the logged error. You should see error similar to the following.
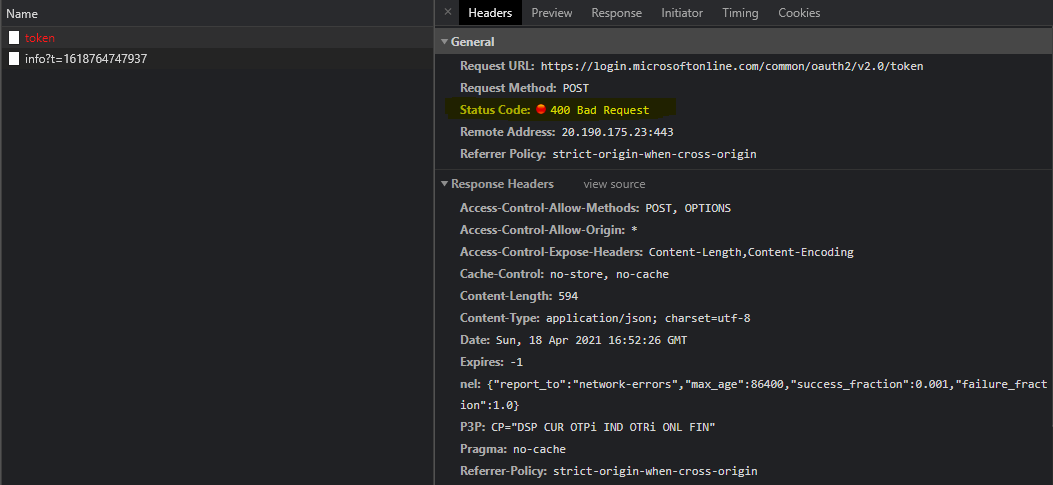
To solve this, You have to add web application in the list of Authorized client applications in web api application registration. For doing that,
- Navigate to Azure Active Directory
- Open Application registration pertaining to web api
- From the sidebar, navigate to Expose an API
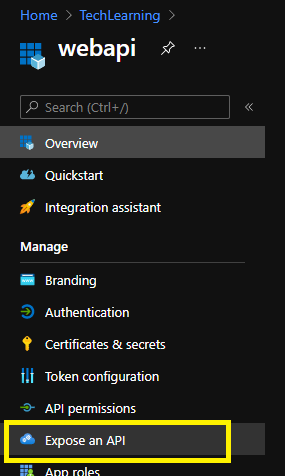
- From Expose an API section, scroll down to Authorized client applications section
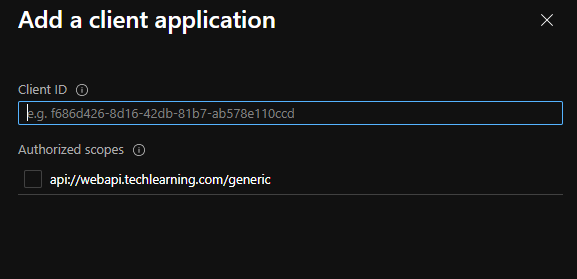
- click on Add a client application
- In client id, add application registration id of Angular web application, Authorize all the scopes, click on Add Application.
With this fix, token request should no longer fail. However, we are still one step away from accurately getting the data from api.
4. Configuring Azure App service of webapi
Upon resolving the previous issue, when you try to navigate to weather page then it will fail again. This time it will fail with different error. If you navaigate to developer’s tool in the browser, you should see the weather api is getting failed with 401 unauthorized error. If the page is bringing the data then you might be logging into the application using account from your home tenant where application registrations are present. You have to use account from different Azure AD tenant.
{
  "code": 401,
  "message": "IDX10205: Issuer validation failed. Issuer: '[PII is hidden]'. Did not match: validationParameters.ValidIssuer: '[PII is hidden]' or validationParameters.ValidIssuers: '[PII is hidden]'."
}
In the above error, Issuer is Azure AD where user is registered. In OAuth 2.0 parlance, Azure AD tenant is Issuer of the User’s identity.
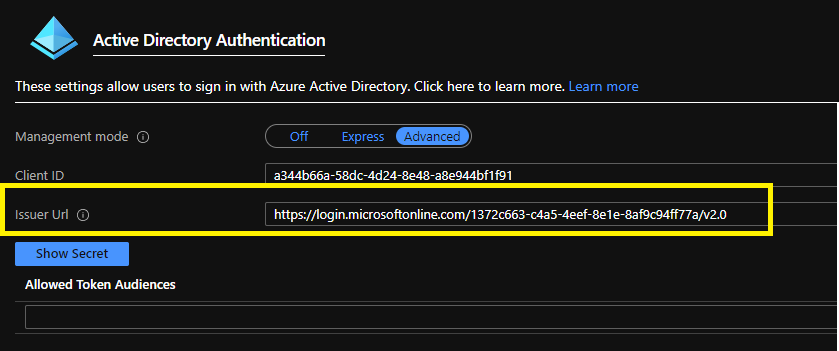
In Part 2, in webapi app service’s App service authentication section, We have configured Issuer Url of a specific Azure AD tenant as shown below. App service authentication process is trying to validate the issuer of the user’s identity with Issuer Url configured here. Since we are signing-in with account from different Azure AD tenant, issuer of the user’s identity could not be validated using specified Issuer Url.
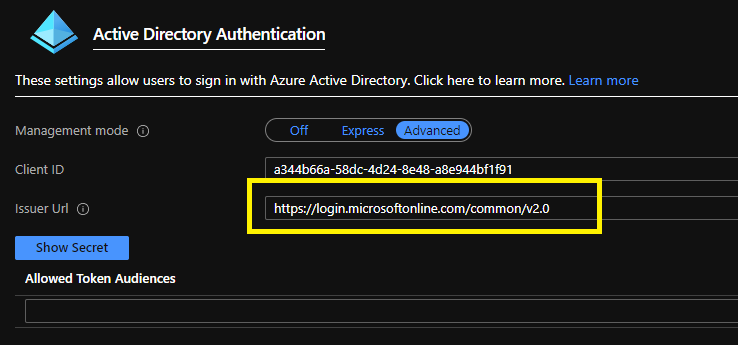
The Issuer url has to be replaced with a common issuer url. It should be replaced with https://login.microsoftonline.com/common/v2.0.
Now when you load the page again. It should execute and it should bring the data.
5. Restricting Access to specific tenants
This setup will basically allow access to all Azure AD users from any tenant. This may not be desirable and you might want to restrict access to only specific tenants. In such cases, you will require to keep allowable list of tenants in your application. Once user logs-in, you will have to fetch tenant id(tid) claim from the token, allow access only if user’s tenant is from allowable list of tenants, else log the user out.
In the same vain, if you want to give access to only specific set of users then you will have to keep the list of allowable users in the application. Only allow access if the logged in user is from this list.




Comments